Heatmap Selector
The Heatmap Selector is designed to help you review selection intevals quickly by viewing multiple channels as a time-aligned heatmap around each sample.
This tool is especially useful when:
your signal pattern is easier to recognise visually than from a single trace,
you want to quickly scan for inclusions/anomalies across many selections,
you want to step through samples and apply consistent selection placement,
you want to compare unknown intervals against existing baseline or sample-group selections.
The window has two main panels:
Left panel: sample list and heatmap options (at bottom).
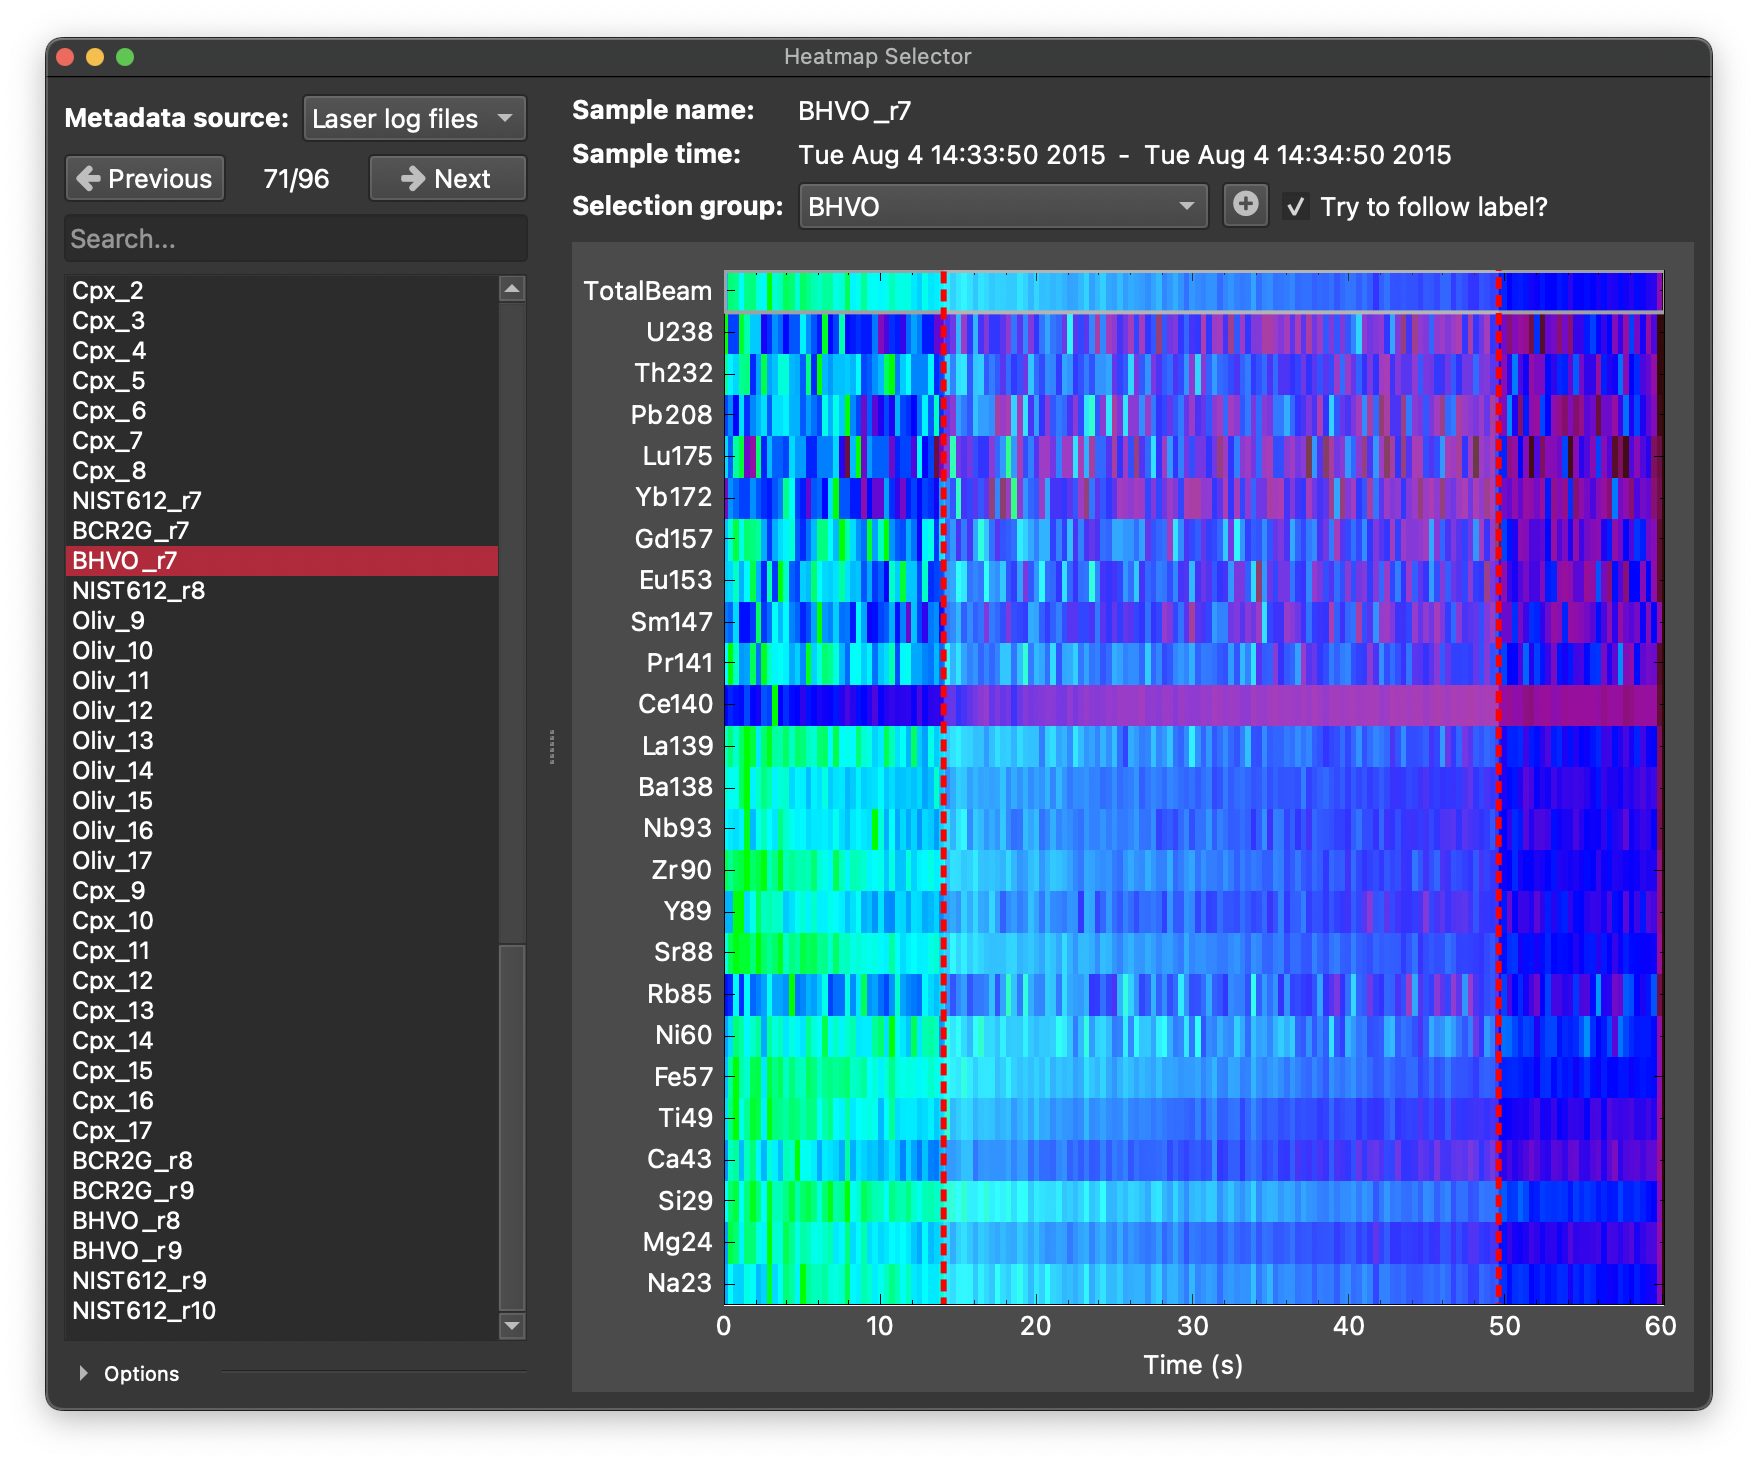
Right panel: sample metadata (top) plus the heatmap plot used for creating/editing selections (bottom).
In the right panel the heatmap shows the selected channels as rows, with time on the x-axis. The colour of each pixel is determined by the value of that channel at that time point, normalised to the minimum and maximum values within the displayed time window (including time before/after offsets). Selections are overlaid on the heatmap as coloured rectangles (red for current group, blue for baseline group), with comments shown near the top of each selection if they exist.
Each row (channel) is normalised over the displayed interval using:

where  is the channel value at each time point within the displayed interval.
Basic Workflow
Choose the Metadata source (Data files or Laser log files).
Select a sample from the list (use Search to filter names).
Choose a Selection group (or create one with the button).
Set channels and display options using the Options button (gradient, scaling, time before/after).
Adjusts selections as needed or drag on the heatmap to create selections.
Step to the next/previous sample and continue.
Selection Groups and Auto-Matching
Choose the destination selection group with Selection group.
If Try to follow label? is enabled, iolite attempts to auto-match the sample name to an existing selection group name using fuzzy matching.
Match ratio (in the Options panel) controls how strict this matching is (0 to 1).
If no suitable group is found, the Selection group label is highlighted to warn you.
Heatmap Display Options
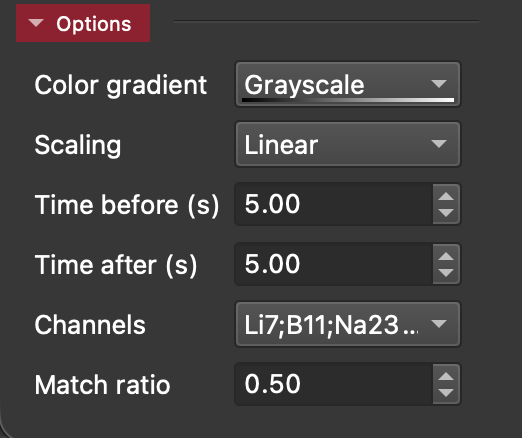
The Options section controls how data are shown:
Color gradient: choose the colormap used for the heatmap.
Scaling: Linear or Log display scaling.
Time before (s) / Time after (s): expand or shrink the displayed window relative to sample start/end.
Channels: select one or more input channels to display as heatmap rows.
Creating Selections
Drag across the heatmap in time to create a new selection.
Left mouse drag: adds a selection to the currently chosen selection group.
Right mouse drag: adds a selection to the baseline group.
Note
You must select a valid destination group before creating selections.
Viewing Existing Selections
Existing selections are overlaid on the heatmap:
current group selections are shown in red,
baseline selections are shown in blue.
If a selection has a comment, the comment text is shown near the top of that selection region.
Editing and Deleting Selections
Click an overlaid selection to select it, then:
drag left edge to adjust start time,
drag right edge to adjust end time,
drag inside selection to move the whole interval.
Tip
A selection is selected when its edges are defined by dashed lines. If a selection is currently selected, dragging on the heatmap will create a new selection instead of adjusting the existing one. To adjust the existing selection, click on it first to select it, then drag on the heatmap.
Keyboard shortcuts:
Delete or Backspace: delete selected selection.
A: add/edit comment for selected selection.
Left/Up arrow: previous sample.
Right/Down arrow: next sample.
Channel Inspection
Double-click a channel row in the heatmap to open a pop-up trace view for that channel over the currently displayed sample time window (including time before/after offsets).
Persistent Settings
The Heatmap Selector remembers your last-used window layout and key options between sessions, including:
splitter and window geometry,
time before/after,
gradient preset,
linear/log scaling,
follow-label toggle,
match ratio.