Getting Your Data Into iolite
Depending on which instrument(s) you have in your lab, you may have to follow different steps to get your data from the mass spec software into a format that is suitable for iolite. And by suitable, we mean that iolite (and any other time-resolved data processing package) requires a few key pieces of information, such as the measurement start time, and measurement timings and count rates for each measurement, to be able to make sense of your data. Additional pieces of information, such as the sample name, are good to have, but their absence can be worked around.
Some mass spectrometer companies change their data file format without informing us, and usually we only hear about changes from our customers when something stops working. We don't have every instrument type in our labs (where would we put them all?) and so if you find that iolite is not able to load your data, it is possible the mass spectrometer company has changed their file format. If that is the case, we will direct you to their customer service. Below are the instruments currently supported and how to export from them. If you find that your instrument is listed but not importing, please feel free to get in contact with us. However, given the above, we may have to direct your questions to the instrument manufacturer. If you see any errors, or have any additions you'd like to add to the following, please just let us know (support@iolite-software.com).
Also covered below is a guide to creating laser log files. These files record the position, state, spot size, etc of the laser during your experiment. Laser log files provide critical information when creating CellSpace images etc, and save you a significant amount of effort by automatically creating selections etc.
Mass Spectrometers
Agilent
Download a pdf guide to exporting data from Mass Hunter here Data_export_from_Agilent_ICP_MS_MassHunter.pdf.
Analytika Jena
(Coming soon!)
Nu Plasma II and III
(Coming soon!)
Nu Instruments AttoM
The files are stored in ‘’ C:\NuAttoLab\Results\OldStyle ‘’ folder as XXXX_TRA_Data.csv files, with XXXX being the file number.
These files can be directly opened by iolite. We recommend making a copy of the files in this folder and working with the copy of the files. Although iolite only ever accesses files in a read-only manner, it serves as a back up and allows you to store your data files in folders associated with sessions (rather than all sessions in one folder).
Nu Instruments Vitesse
Exporting Images
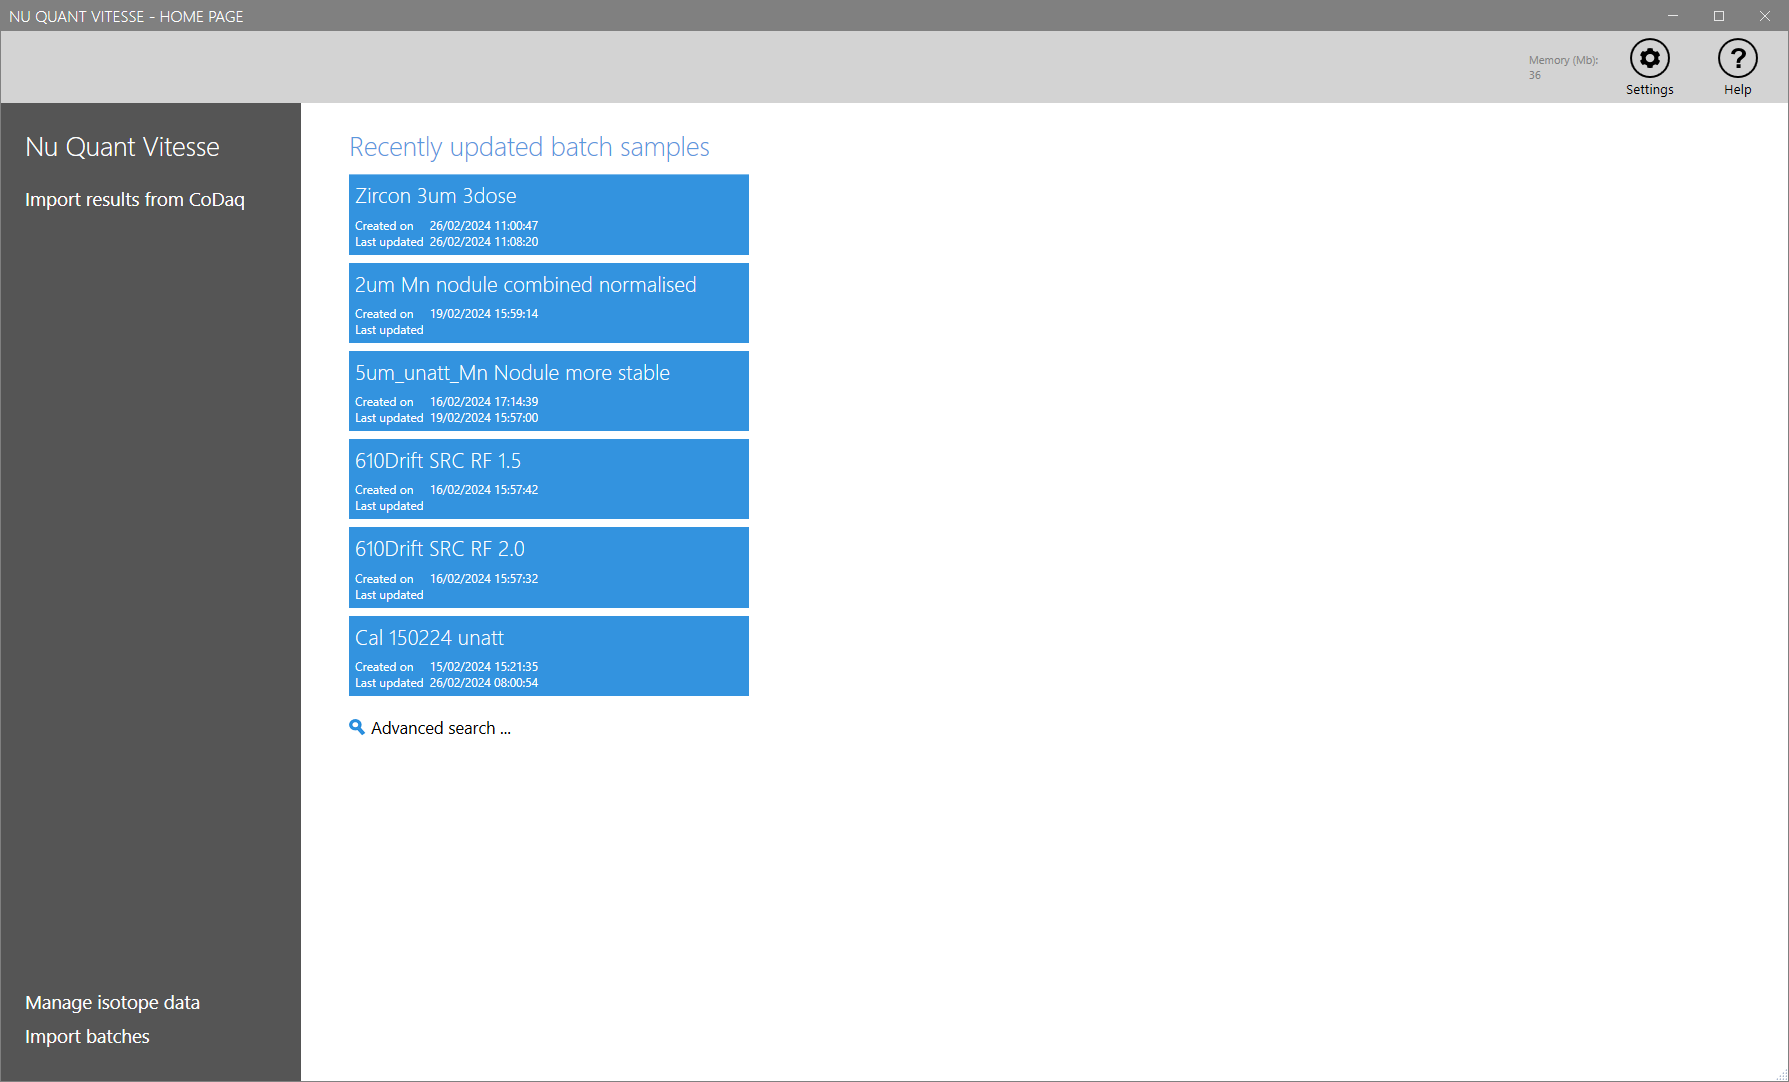
Import results from CoDaq
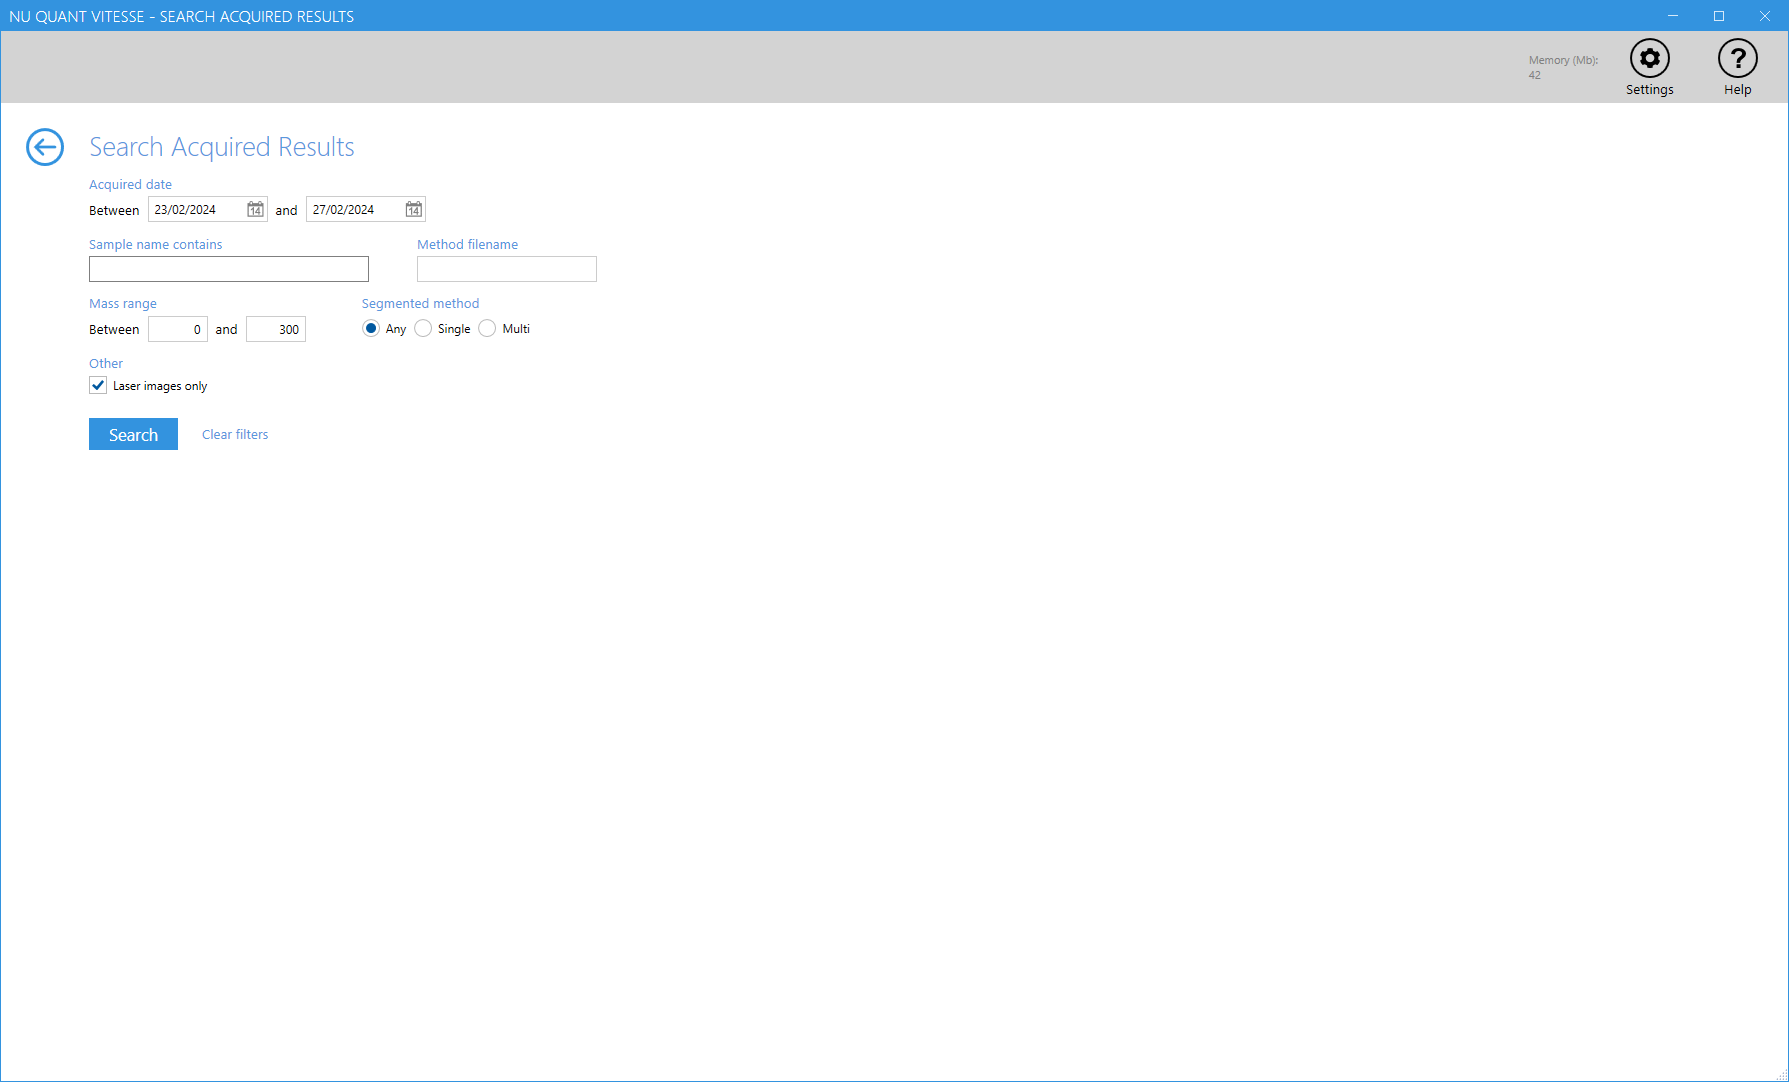
Update search mask to find desired data file
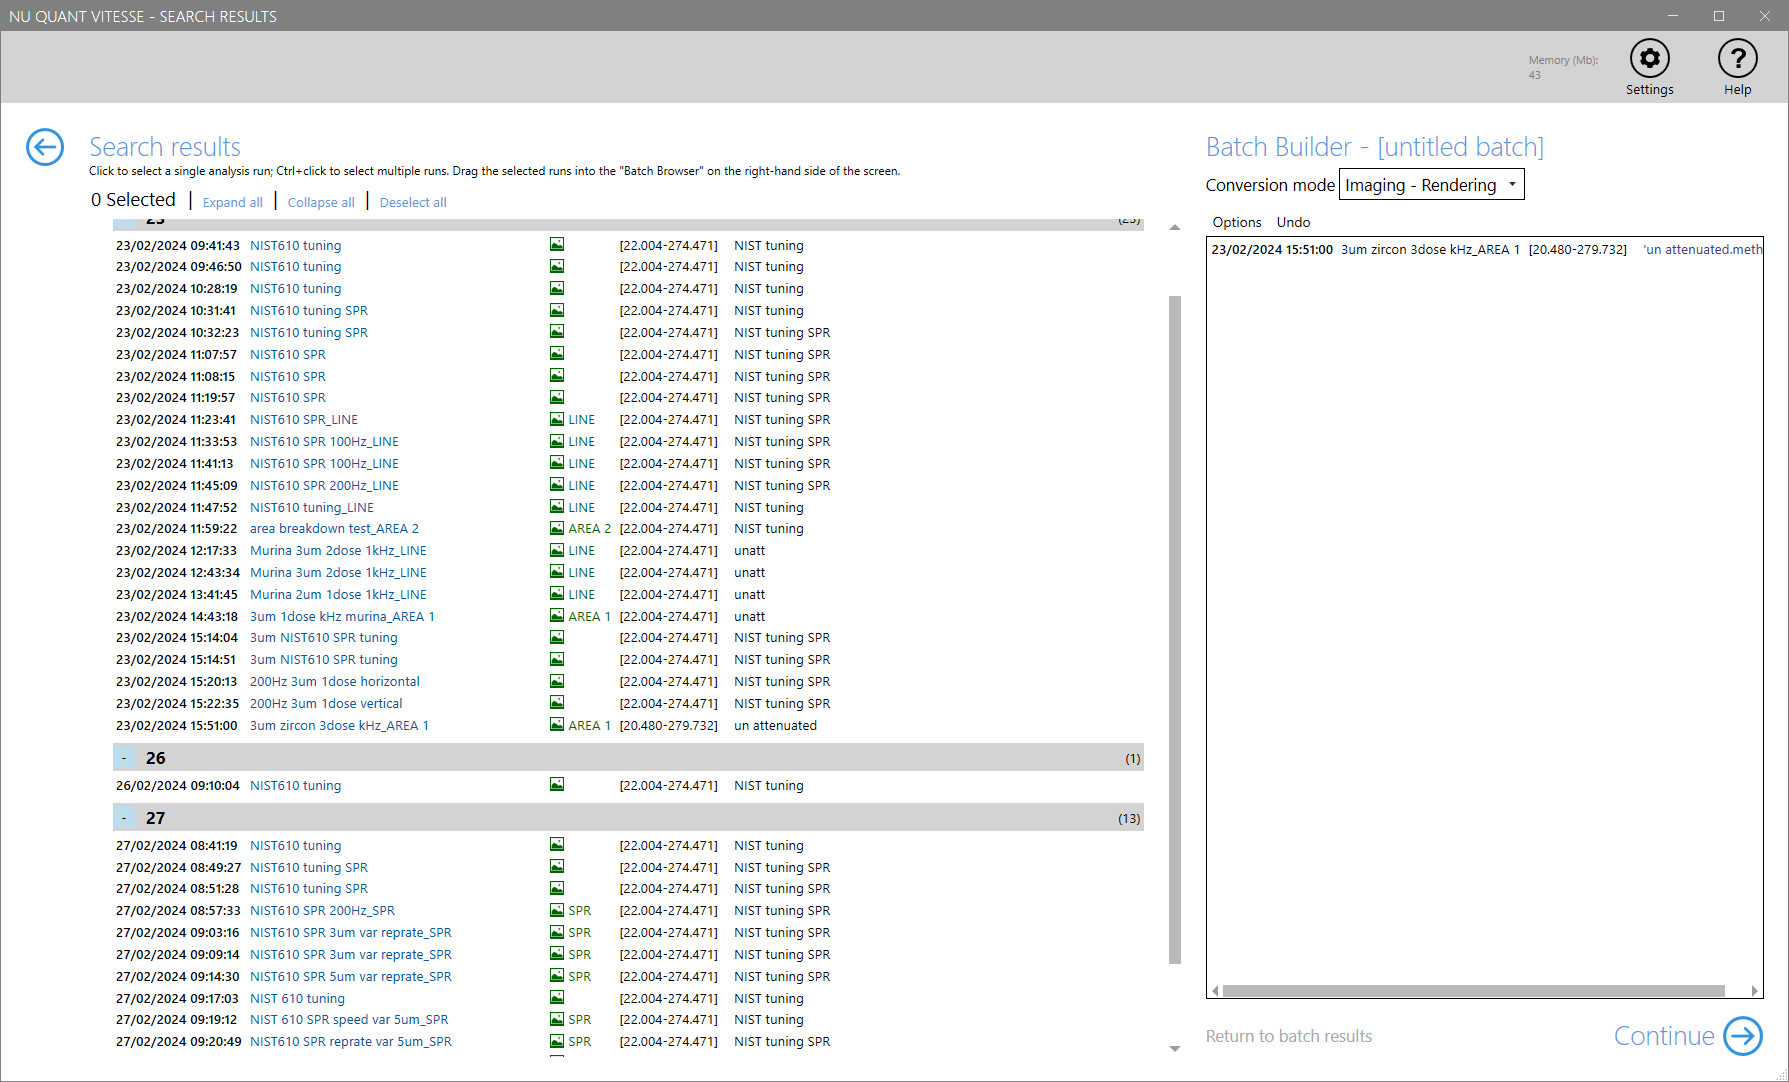
Add desired data file to the batch builder (right-hand side) by double clicking or dragging and select the conversion mode “Imaging – Rendering”
Select the NICE script (for example
Imaging – Simple counts display) and set the export value to “1”. Then select the isotopes which should be rendered and exported by either selecting them individually, or applying a saved selection form the dropdown list.
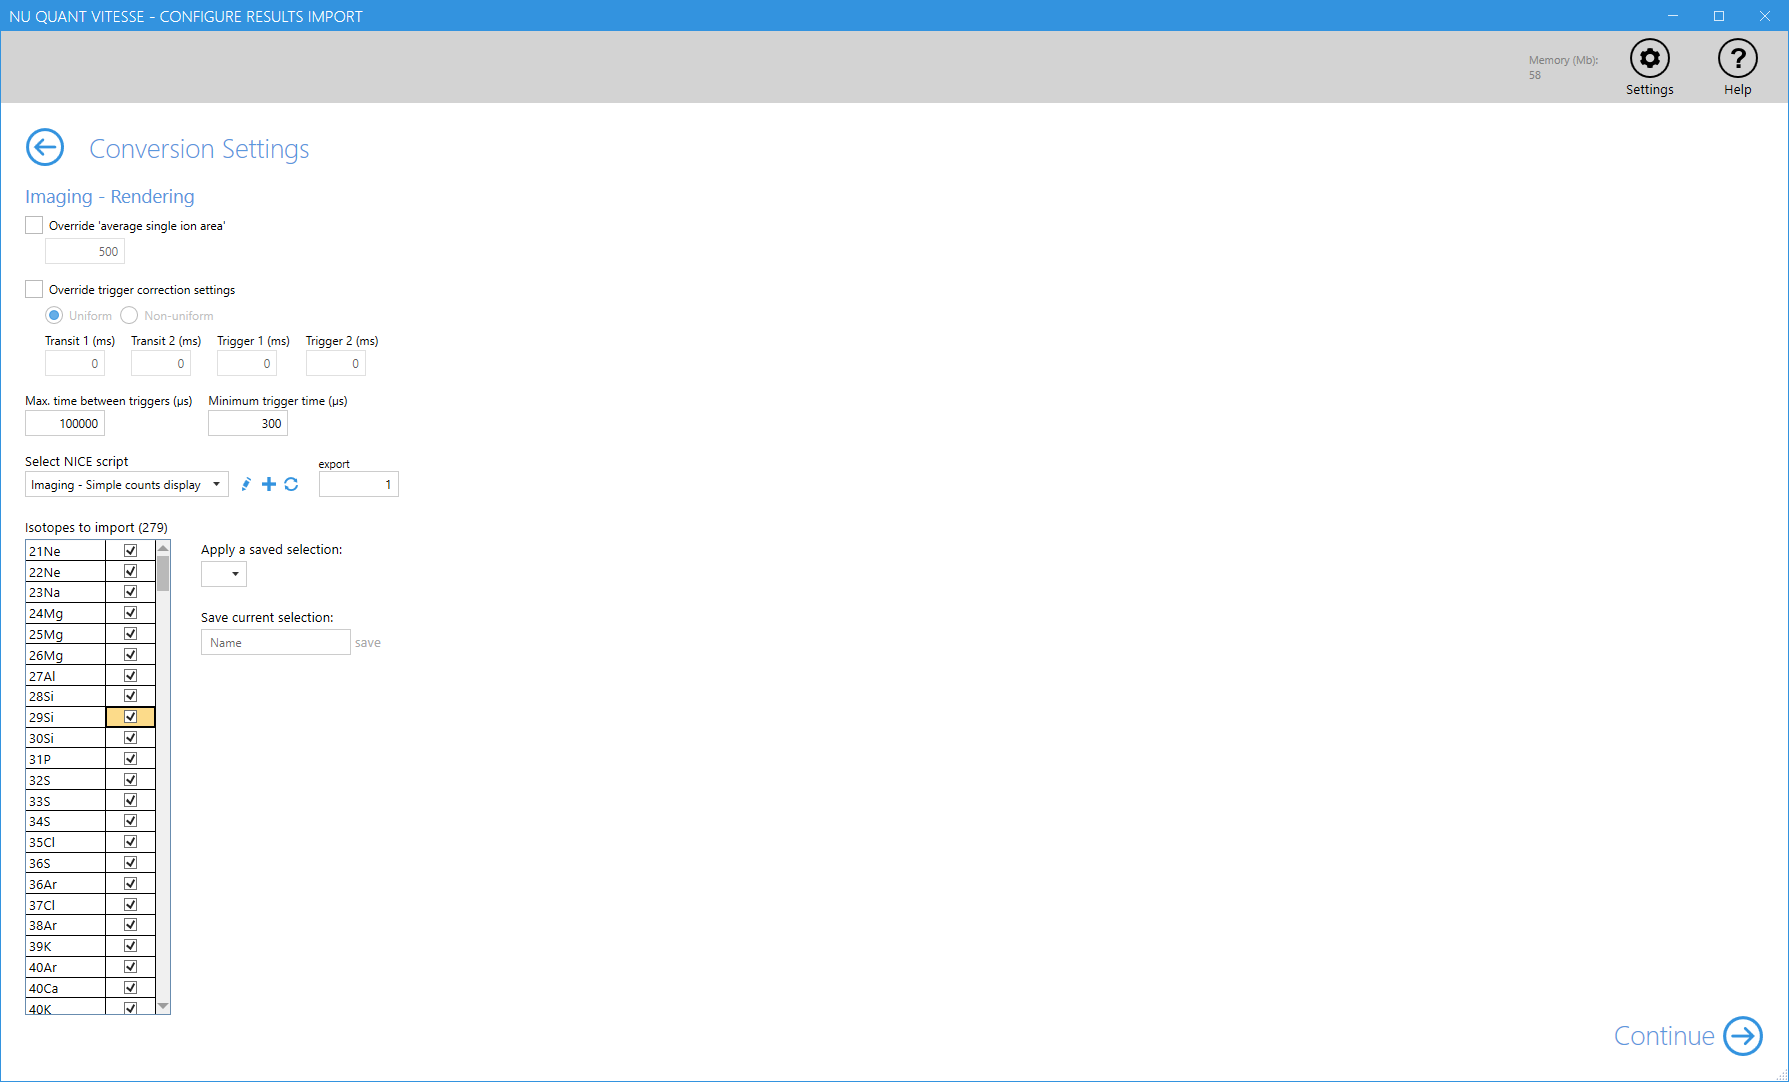
Press “Continue”. The data will be reduced and plotted. Additionally, the results will be saved as a datafile which can be imported into other software packages at the location “C:VitesseExport”
Importing NICE scripts
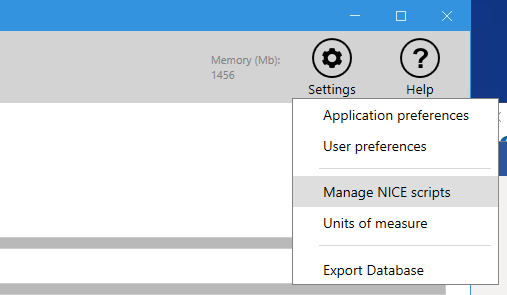
At the top right of NuQuant select “Settings → Manage NICE scripts”
Right click the “Global” label and select “Import script…”

Once you have selected the script and imported it, it will appear in the list and can be used in any instance of NuQuant.
Perkin Elmer
The following guides have been prepared by Perkin Elmer staff, and depend on which version of Syngistix you are using. If you have any questions about any of the content, please contact Perkin Elmer using the contact details in the guides below.
For Syngistix v2.5
For Syngistix v3.x Multi-quad Instruments
For Syngistix v3.x Single-quad Instruments
NetCDF Export Method Template File
(Many thanks to Tephy Marillo-Sialer for providing the above details).
Thermo Element
It is important that all samples have been analyzed with the same method.
Open the Sequence Window which includes analysed samples and reference materials.
In the Sequence Window, select Reset Item
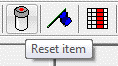
Fig. 1 The Reset item button
The software will ask which samples to reset. Select All.
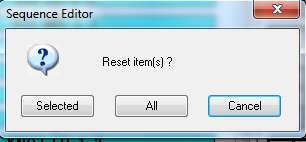
Fig. 2 The Reset items options. In this case, select All
After all the samples are reset, Click the blue flag (Start Button)

Fig. 3 The Start button
In the window that appears, select Evaluate and Chrom. Data in the Sequence section.

Fig. 4 Settings for the Sequence Editor
From the report template, select Thermo_Glitter.srcf:
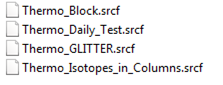
Fig. 5 Select the Thermo_Glitter.srcf format
After selecting the report format, click the Run button. This will create the .FIN2 files in the same folder.
You can now load the .FIN2 files in iolite v4.
(Many thanks to Merve Caner for the above details).
Thermo iCap
Thermo iCAP RQ and iCAP TQ
When you set up your Labbook sequence, make sure it is with the Evaluation type trQuant
After the sequence has finished, in Qtegra in the open Labbook click on the Export button. This will open a new window (see Fig. 6)
From the drop down box select the Laser Data Reduction Export option.
Add the isotopes you want to export to the Exported Analytes pane by clicking on them and clicking Select, or use the Select All button.
Choose the folder you would like to export to under Path and give the output files a name under Filename (it will automatically add the run number to the end of each file so that each sample has an individual export file)
Click the Export Button.
Qtegra will have created .csv files in the folder you chose, they can be imported directly into Iolite
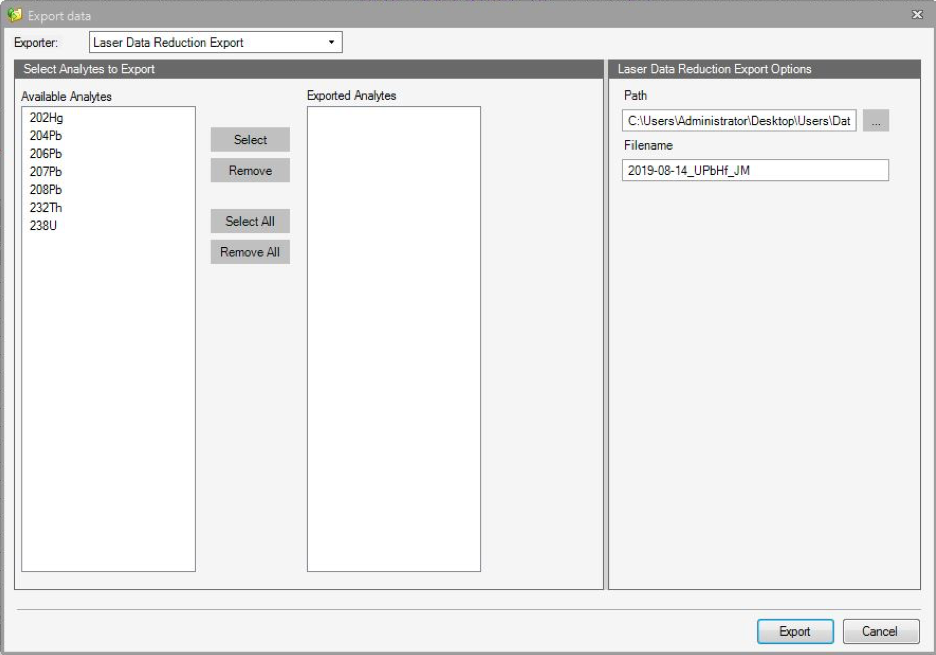
Fig. 6 Setting up export in Qtegra Labbook
(Many thanks to Ashlea Wainwright for the above details).
Thermo Neoma
Go to the query section along the left hand “Content” area.
For the query, set up the columns as shown in the Figure Fig. 7
Might need to click the green refresh icon in the results area of the query.
Click the export button on the main toolbar.
Select the “Query Excel Export” option and give it a name. Even though they call it Excel export, it is xml.
Wait for that to finish.
Import the resulting xml file in iolite as normal.
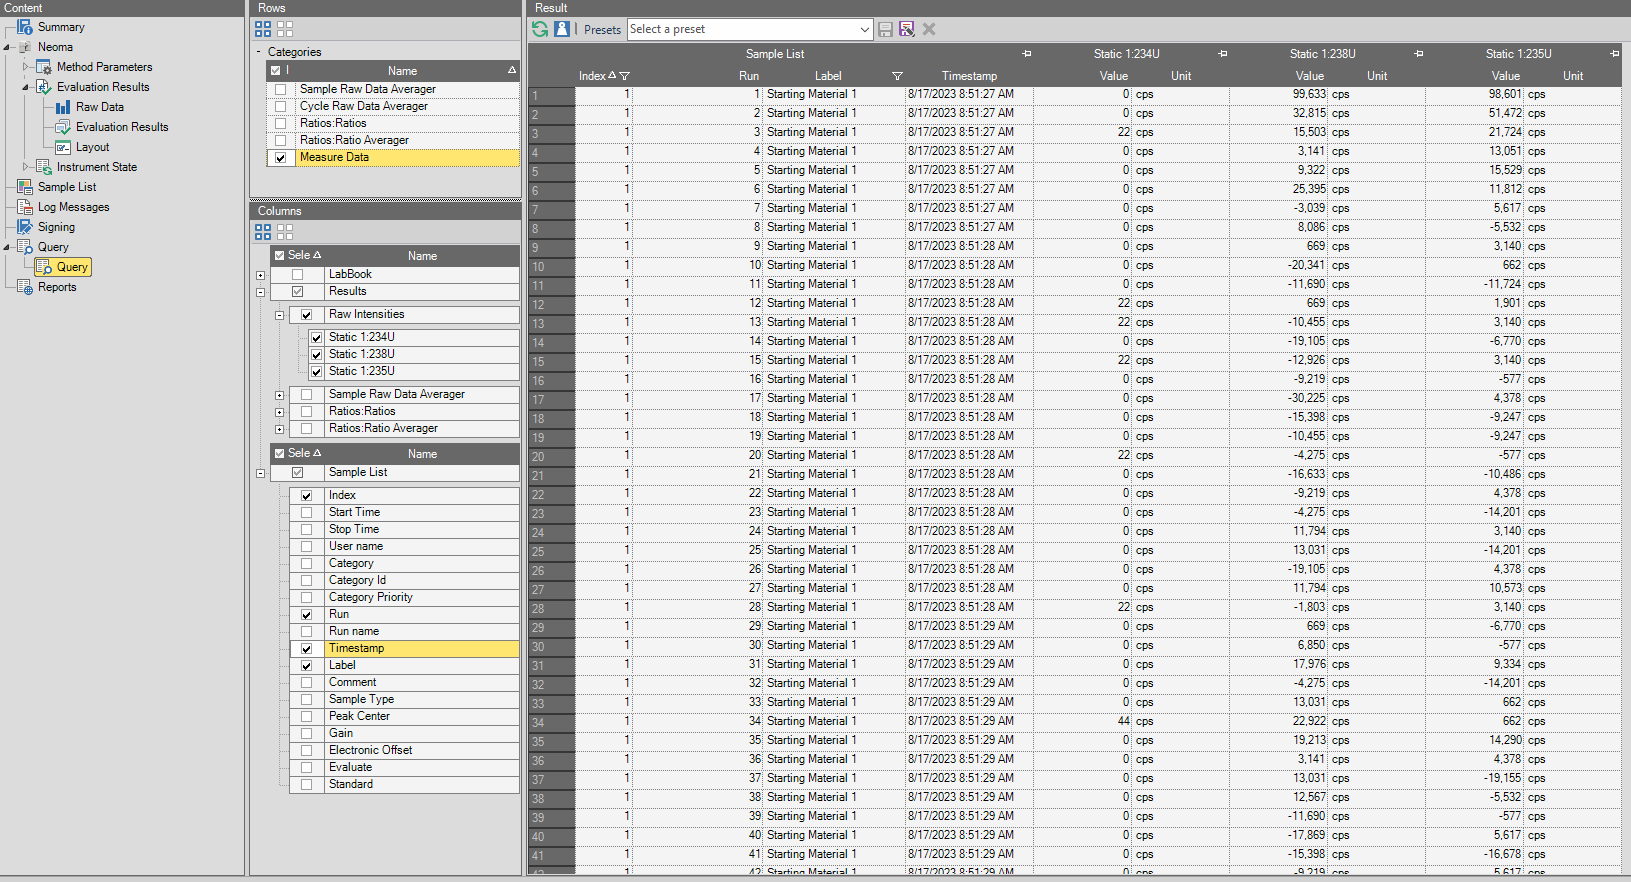
Fig. 7 The query setup for the Neoma
Thermo Neptune and Triton
Open the Data Evaluation program and navigate to the files you want to export in the File Browser on the left
You can either export individually or in bulk. To export in bulk, select all of the files you want to export (either hold Shift and click on the first and last analysis - this selects all files between the first and last analysis, or hold Control and click on each one separately)
Right click on the selected files and select Export files (see Fig. 8)
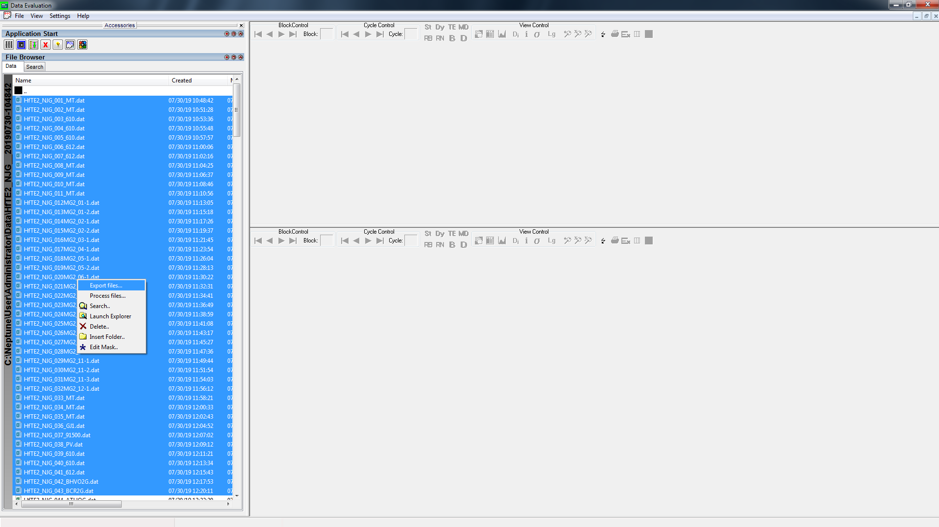
Fig. 8 Exporting files from Thermo Data Evaluation for iolite
A new window will open with two drop down menus, the Data Mode is either static or dynamic - this refers to how you ran the method with one cup configuration or multiple cup configurations, if you’re unsure leave it on static
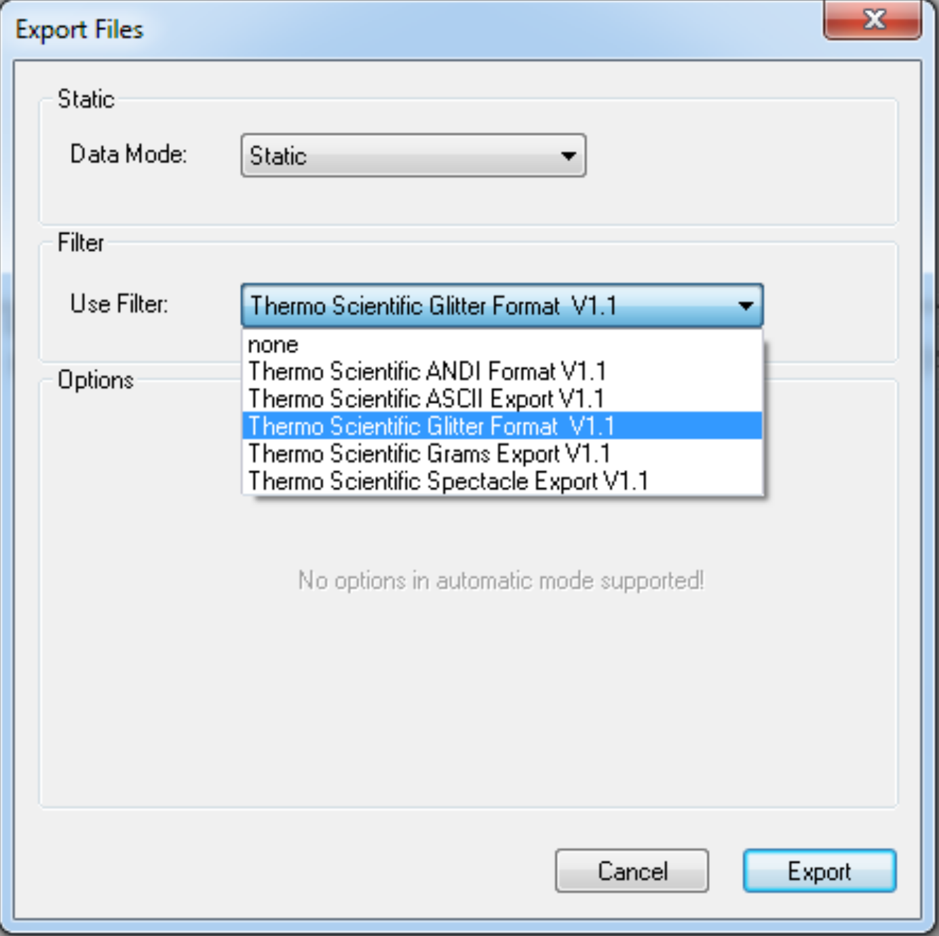
Fig. 9 Selecting options for export from Thermo to iolite
From the second drop down menu select Thermo Scientific Glitter Format V1.1, and then click Export
The evaluation program will now open each file and export it, so you will see each file flash through the program. It may appear that the program is misbehaving but this is normal
This creates a .FIN2 file for each analysis in the folder where your data is located, you can copy just the .FIN2 files onto a USB to import into Iolite
Note
Do not move the folder with your data in it before you export it, as this will change the timestamp in the files and iolite will think all your analyses were measured at the same time. If you do this accidentally, you can move it back to the original folder and it will now be exported correctly (e.g. all you analyses are automatically saved in the “Data” folder, but you have subfolders for each isotopic system, if you move the automatically created folder from the “Data” folder into a sub folder, it will be given the wrong timestamp
(Many thanks to Ashlea Wainwright for the above details).
Thermo X-Series
After the sequence has finished, in PlasmaLab go to the Results/Numerical Results tab.
Right click in the table and select "Export csv file" (see Fig. 10).
You will be prompted to specify the file name.
The resulting csv can be imported directly into iolite.
If multiple samples were included in the sequence, these will be recorded in the csv file and iolite will recognize them.
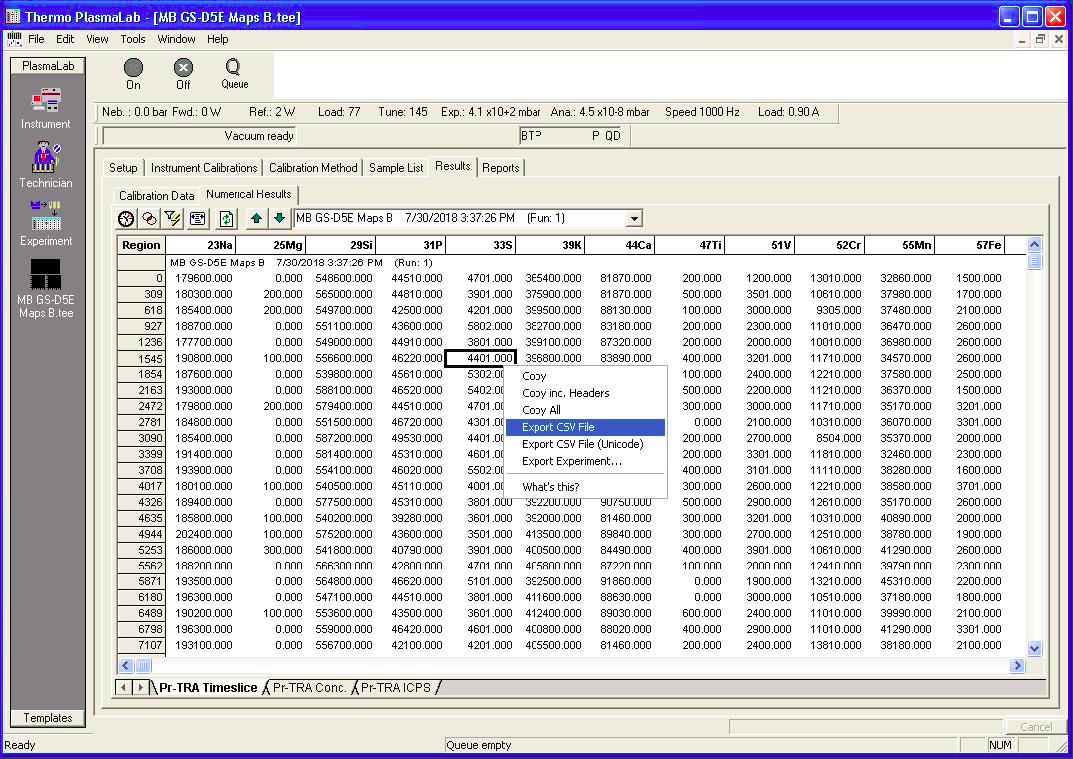
Fig. 10 Exporting files from PlasmaLab for iolite
TOFWERK
(Coming soon!)
Lasers
Below are quick guides on how to create a laser log file from the major laser providers. If you see an error, or have a suggestion, please contact us at support@iolite-software.com).
Warning
Please ensure that you enable laser log file collection before you start your experiment. Laser log files cannot be created after an experiment has finished.
Applied Spectra
To create an iolite-compatible laser log file in GeoStar, just ensure that the "Make CSV Log" option is checked when you are presented with options when starting your run sequence, as shown below (Fig Fig. 11).
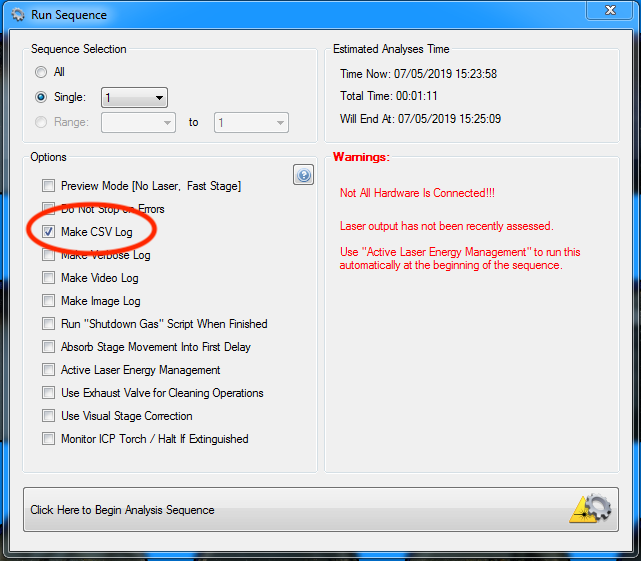
Fig. 11 Make sure the Make CSV Log option is checked before starting your run.
CETAC - Teledyne
Chromium software always stores the data required to create the Iolite compatible Laser Log file. Nothing special needs to be done before running an experiment, but the experiment must be run to collect the data. After running an experiment, click the Save button, then click the Export Data drop down menu item.
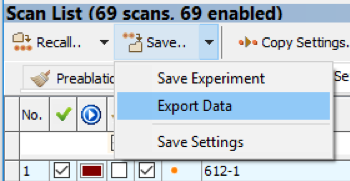
Fig. 12 Click the Save button to export your data from Chromium
The standard Windows Save File dialog will appear. After saving the Laser Log file, another window will pop up, allowing selection of images to save for use with Iolite CellSpace (see Fig. 13). Any image in Chromium, whether a mosaic, an imported image, or a single camera frame can be exported for use with CellSpace.
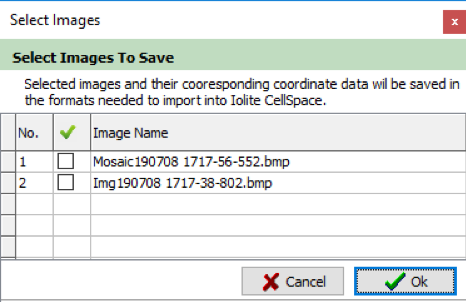
Fig. 13 Saving images our of Chromium for CETAC lasers
Check the box for any images you want to save, and Chromium will export the image along with its companion CellSpace Coord file.
(Many thanks to Jay Bernasek for providing the above details).
ESL
Active View 1
The functionality to create iolite-compatible log files is available in the laser ablation software version 4.0.3.11+.
To turn on logging, there is a checkbox in the “Run Scans” window that needs to be checked (see Fig. 14). After running the experiment, the log file is written to C:\ProgramData\NWRESI\LaserAblation\Data\ScanLogs folder with a timestamp with the format: "ScanLog_16-10-18_11-25-33.csv"
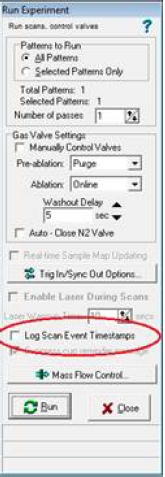
Fig. 14 Run Experiment window. The ’Log Scan Event’ Timestamps checkbox is highlighted (red circle).
Active View 2
Ensure that the “Log Scan Event Timestamps” option is checked before running the analysis (see Fig. 15 and Fig. 16 below)
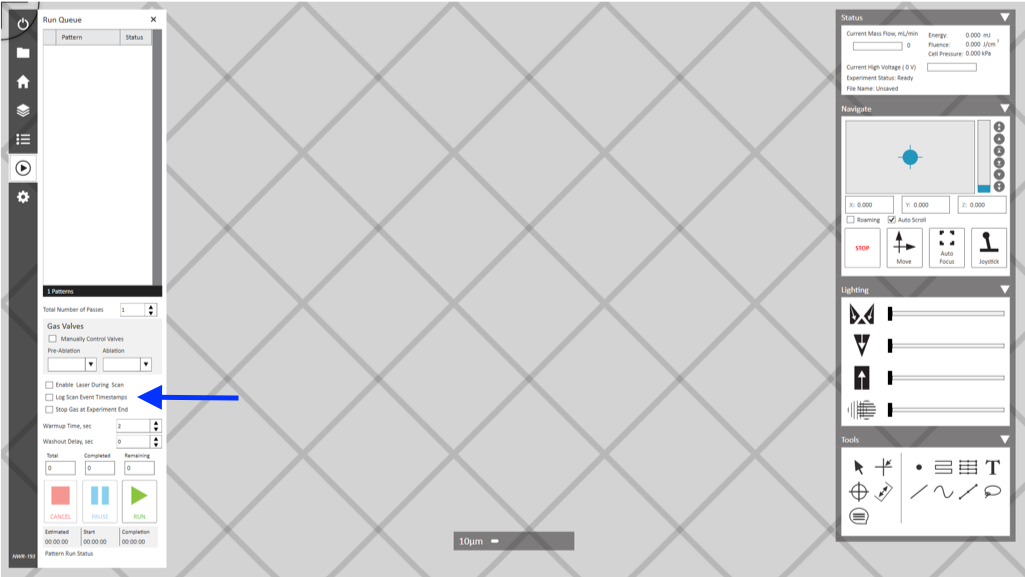
Fig. 15 How to create log files from ESL lasers with Active View 2
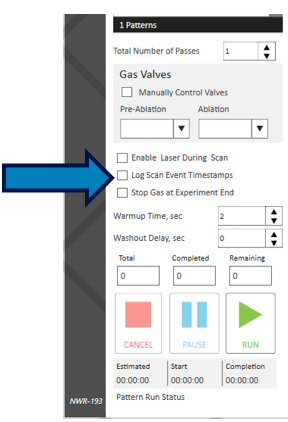
Fig. 16 How to create log files from ESL lasers with Active View 2 (detail)
This creates an iolite-compatible log file of laser position and pattern timing. Logs are created in C:\\ProgramData\ESI\ScanLogs\. Each time the Run Queue starts, a new Log is created. Logs are automatically named with the time they were created in the format LaserLog_YY-MM-DD_hh-mm-ss.csv.
(Many thanks to the ESL Applications Team for the above details).